Are you someone who loves to travel and enjoys the outdoors? Growing up in my family, we always went on a trip to a magical place. A beautiful destination for travel, where you’re surrounded by a flowing river, pine trees, and fresh air. Most cabins are located on the river, and the smell of the outdoors is right at your fingertips. There are kids roaming free at the resort on their bikes, with friends and family, staying up late and enjoying the time they have together for the week. This is a place that brings me remarkable joy! It’s a place where I feel at peace and one with nature. I feel free from all the hustle and bustle of everyday life. It’s a place where I come to relax, to recuperate, and to be one with God. When I am at Trinity, a few songs come to mind…
John Denver once sang…
“And the Colorado Rocky Mountain high
I’ve seen it rainin’ fire in the sky
You talk to God and listen to the casual reply
Rocky Mountain high
Rocky Mountain high”
I’ve seen it rainin’ fire in the sky
You talk to God and listen to the casual reply
Rocky Mountain high
Rocky Mountain high”
John Denver had a love for the outdoors, and when you listen to his music, you can feel it in his soul how much the outdoors meant to him. His love for the outdoors was always felt in the majority of his songs. His love for the Colorado Rocky Mountains to his love for West Virginia…
“Country roads, take me home
To the place I belong
West Virginia, mountain mama
Take me home, country roads”
To the place I belong
West Virginia, mountain mama
Take me home, country roads”
John Denver sang it all, but with passion in his heart for the very things that brought him joy and probably his peace. My love for the outdoors may not be in the Colorado mountains or West Virginia, as I haven’t traveled to those areas on a full-blown trip. My simple love for the outdoors starts in the Trinity Alps mountains at a place called Trinity Alps Resort. This is a place that is a step above camping, rustic, and in the middle of nowhere. Trinity Alps resort was built in the 1920s. Some of the cabins at Trinity Alps Resort date back to 1924, while new cabins were built several years ago. This place is more magical than Disneyland, in my opinion. As a child, the eight-hour drive to Trinity always made me happy! Waking up in the morning in your cabin, hearing the river, sleeping out on the deck with the breath of fresh air in your face, is just the most calming feeling ever. Walking across the cabin floors and hearing them creak always holds a memory for me. Knowing that I am sitting at a table I once sat at, as a child, also always holds a special place in my heart. I’ve been going to Trinity Alps since I was a small baby, almost forty years. The memories of being at the resort from childhood bring back vivid memories when I visit as an adult. The smell of fresh air around you as you’re surrounded by trees, old cabins, and a river, makes my heart happy. Today, I wanted to share how I pack for a trip like this. In honor of my upcoming trip with my parents, I will share how I pack for Trinity. I have a simple way of packing for this trip! I have a streamlined way of packing that is applicable to anyone going on an outdoor trip like mine and staying in a cabin. Mind you, this trip isn’t camping, so I am not packing all my camping gear. One of these days, I will make a blog post about how to pack for camping. Today, I wanted to share my packing tips! It may be the end of summer, but that’s okay! Let’s enjoy the outdoors while we still can before the season changes!
How I Pack for Cabin Trips
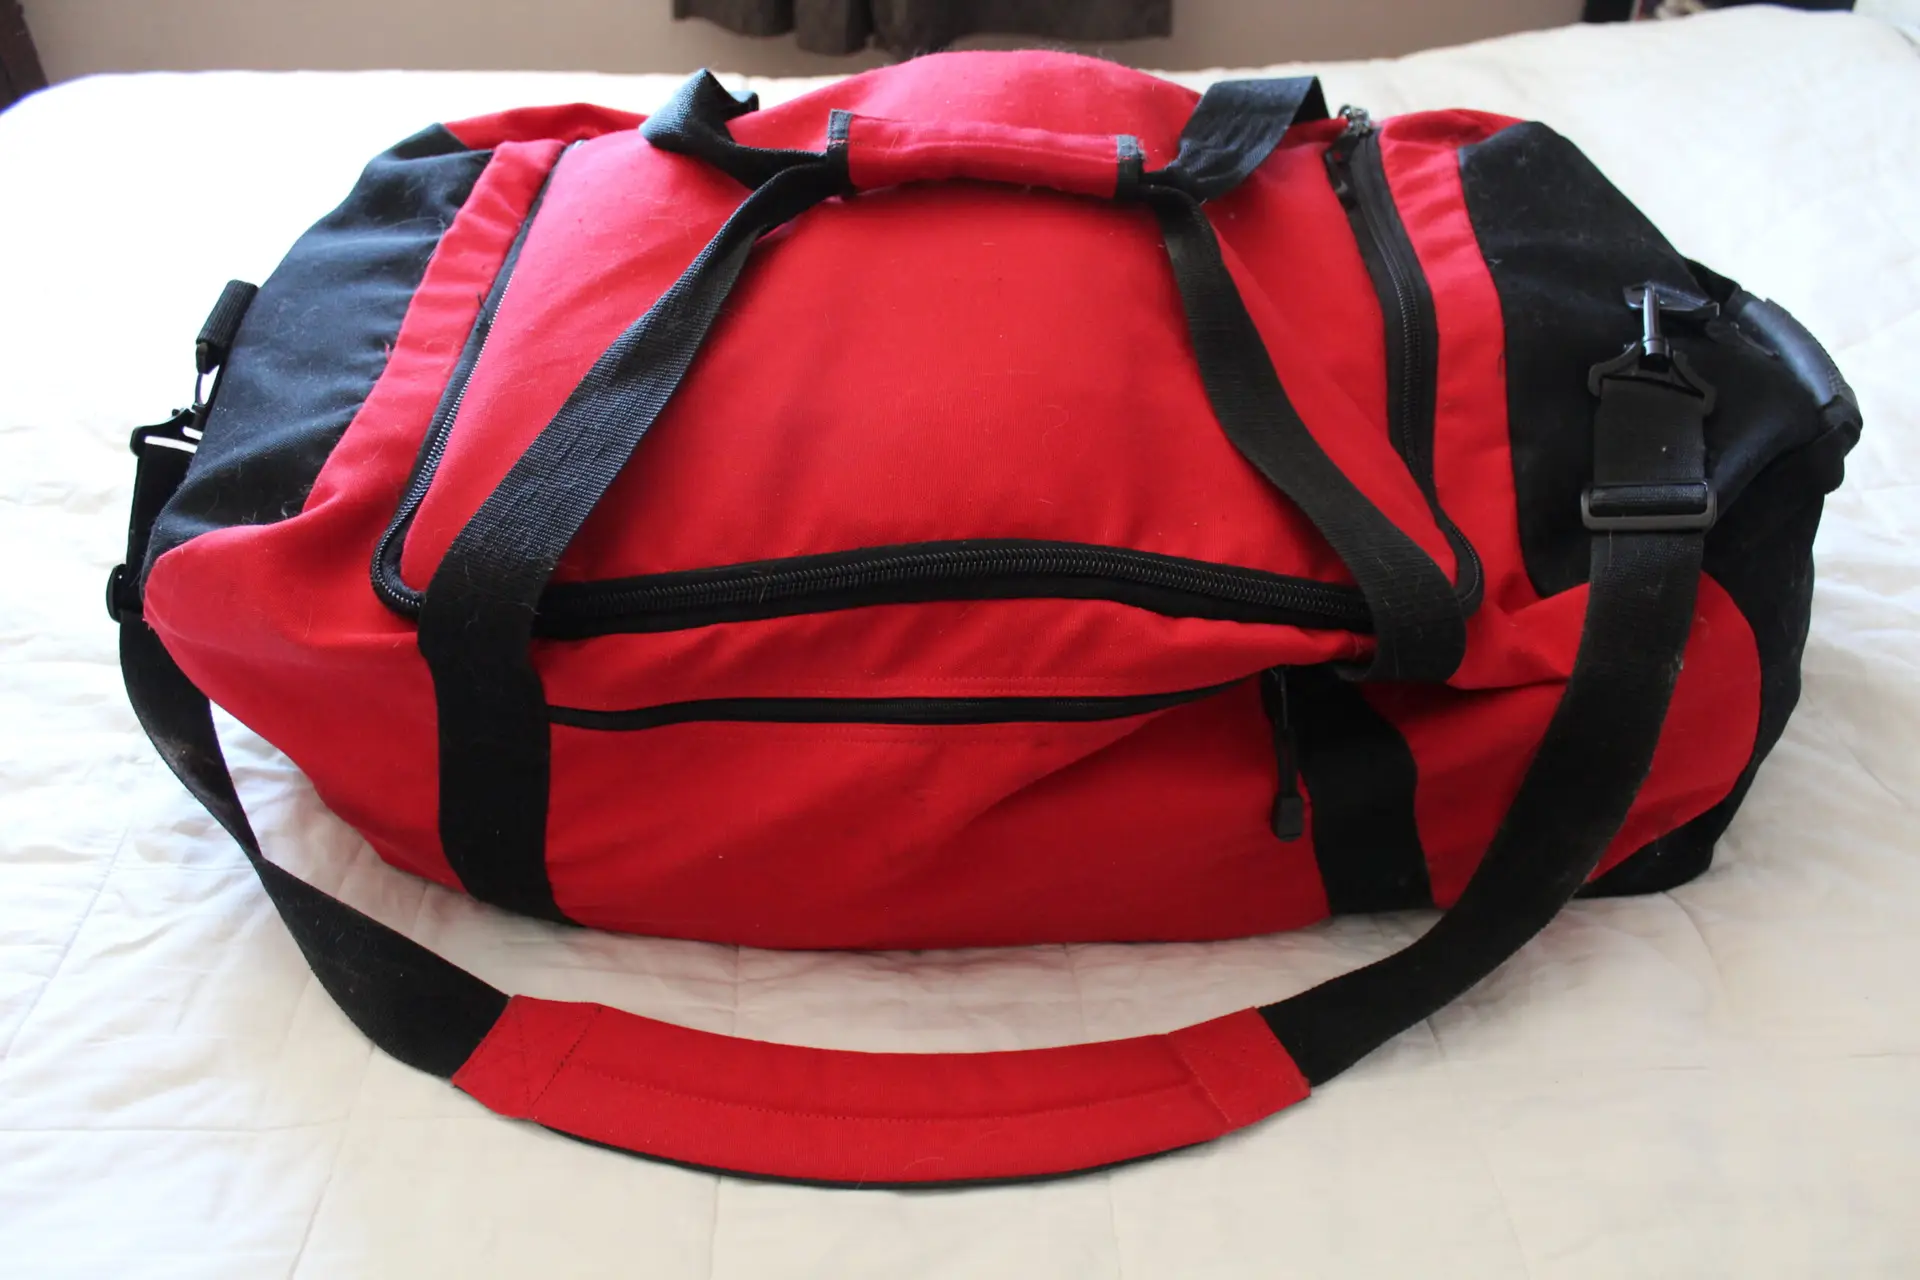
When I travel to the Trinity Alps, I always like to bring a duffel bag. It’s sturdy and can hold a good amount of clothes, shoes, travel toiletries, and other necessities. My parents always bring suitcases. It’s easier on their backs, and they can wheel in their suitcases into the cabin.


Duffle Bag- You can wash it, and it’s durable. I got this bag as a birthday gift from my parents several years back. My brother is a firefighter, and he had recommended this website where he got all his gear.


Packing Cubes- Packing cubes are great for organizing all your socks, the many unmentionables, clothes, and whatever else can fit in each packing cube. I always pack some outdoor clothes, hiking socks, hiking shoes, a swimsuit cover-up, and a swimsuit. Then I like to pack regular clothes, which consist of shorts, jeans, tops, sundresses, pajamas, and my light-weight bathrobe. I always store the packing cubes in this bag for the following year. The packing cubes fit inside the one large packing cube.


Travel Zipper Bags- I found these Isaac Mazari travel zipper bags in store at HomeGoods and love them! They hold things like my hair clips and my scrunchies. The mesh travel zipper bags are great for your sunblock. The mesh bags are breathable, which I love. I got these last year and have been using them on many occasions where my spouse and I have had to travel somewhere.


Towel- I’ve been loving the Sand Cloud towel because it’s lightweight and can easily dry on any clothesline. I also love the towel because it does not take up a lot of space in my bag. Plus, the towel is pretty. Do note that these towels can be washed in a machine but then have to be hung dry. I always keep this towel in the duffel bag. The towel also double as a blanket for the outdoors or can be used on your bed. The second photo is also a beach towel cover up and I use it to go down to the river at Trinity. I also use it at home when I go swimming in our neighborhood pool. That towel is from Sand Cloud as well! I always keep that towel in my duffle bag. I don’t have a big hall closet and room to store this store this towel.

Bathrobe- I have one that is lightweight and saves space. It’s perfect for packing because it’s so lightweight and will not take up much space.

Shoe Bags- Your shoes will get dirty! You do not want to drag your dirty shoes home. You could use plastic bags, but I use these free fabric bags that came with a set of sheets. They make the perfect travel shoe bags. Plus you are resusing something that might otherwise just go straight to the landfill.

Laundry Bag- You need a place to store your dirty clothes, and this bag is a great one. My brother, a firefighter, recommended a website a few years ago for gear he needed for his job. Unfortunately, I don’t remember the name of the website. You can Google websites for tactical gear. I found that bag on a tactical gear website, and my mom bought it for me as a birthday gift. I love the laundry bag because it’s very sturdy and it holds up well. I can hang the bag on the cabin door because of its long strap. Well worth it to own a laundry bag! Who wants to mix in clean clothes with dirty clothes?

Travel Kit- My travel kit consists of travel-sized items in each compartment of the bag. The items in the kit consist of my toothbrush, toothpaste, floss, soap, Band-Aids, lotion, hair products, shampoo, conditioner, and other essential items. I got this bag a few years back from Vera Bradley. It holds a lot of stuff and that is why I love it!

Here are essentials I keep in this duffel bag year-round:
- Towel
- Swimsuit coverup
- Hiking hat
- Water Shoes
- Shower Shoes
I keep these items in the bag year-round, so I do not forget to bring them the following year. It makes packing for Trinity easy because these items are already in my duffel bag.
I always carry a travel bag for Trinity. It’s a bag that I can use when I go camping or on a road trip. This bag consists of items that never leave: my sunglasses, a book to read, a knitting project, bags for collecting rocks, and pencils for taking notes when I am inspired for my blog. I will make a blog post about this bag and what you will find inside. I love taking this bag because I never have to pack the items inside. Everything you find in this bag, stays in this bag!
I wanted to say that I created this post to give people ideas on how to pack for cabin trips. You do not have to feel like you have to pack this way. I am at a resort, so sometimes, I pack extra clothes and accessories for events. A few times, I was in the talent show or my parents and I drove into town for dinner, and I wanted to dress nicely. I also tend to pack extra clothes simply because it gets dirty up in the mountains at the resort. I will have to do a blog post about Trinity Alps Resort.
I also wanted your feed back on this post! How was my writing? Where could I improve? How can make my blog post stand out? What kind of content should I create? I welcome all inspirational ideas! Don’t forget to subscribe here to A Handmade Story! You should see the popup link when you first go to my blog. Sign up with your email! Then go to your email to confirm the confirmation for A Handmade Story. Follow me on instagram and facebook as well!
“Keep close to Nature’s heart… and break clear away, once in a while, and climb a mountain or spend a week in the woods. Wash your spirit clean.” – John Muir
“Live in the sunshine, swim in the sea, drink the wild air.” – Ralph Waldo Emerson
#ahandmadestory #ahandmadestoryblogpost #outdoors #Trinity #travel #newblogpost #like&subscribe #newblogger #outdoors #mountains #growthisblog #godsgotthis #verabradely #eBags #IsaacMizrahi #SandCloud #TJMaxx #tacticalgear #TrinityAlpsResort


